Wednesday, September 17, 2008

Improving the sequence

I didn't like it that the radiator was assembled before the cpu. But it took some effort to get the cooling fluid out of the system. But today I took the time and coupled the tubes in the correct sequence being pump->cpu->radiator->reservoir.

Also I put in new coolant (still blue). So this is the new setup.

And what are the results? I like it very much temperature wise. At idle the cpu temperature remains at 24 degrees Celsius and the case temperature now remains at 27 degrees Celsius. Look at the screenshot I toch of the hardware monitor of CPUID.

At full load (after playing a demanding game) the case temperature remains at maximum 30 degrees Celsius. After all I can conclude that watercooling for me is a nice improvement and less risky than I anticipated.

Monday, September 15, 2008

New insight

The first issue I addressed (point 2), has been the fans on the radiator. The hanging up is improved so the air is blown out of the case. A fan sucks the air from the radiator and blows it out of the case. However the effect appeared to be minimal. So I added a second fan (blue led fan) which blows the air over the radiator. See below.


These two fans still don't make a big difference the temperature of the cpu remains 35 degrees celsius and the case remains 40 degrees celsius. Next step is correcting the sequence.

Thursday, September 11, 2008

Building in watercooling IV

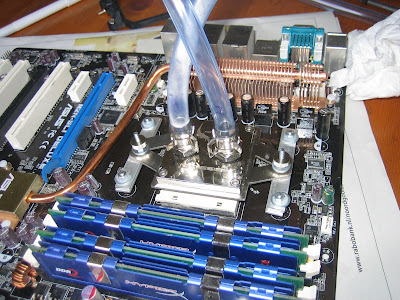
Having the watercooling built in that is it? Not quite. The cpu temperature looks 5 degrees celsius lower than before at a first glance, but after running longer the temperature rises to the same level as before between 30 en 35 degrees celsius. And higher, so we are now pumping around warmth.

I have analyzed the problem and these are the problems that need to be addressed:
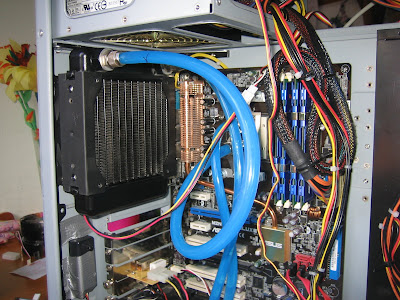
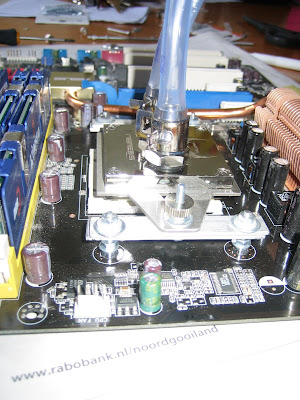
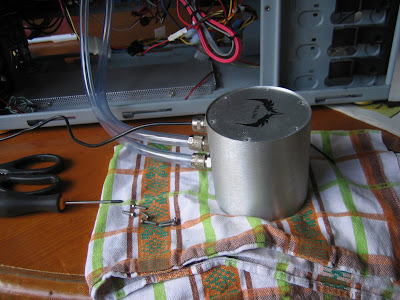
1. the sequence is wrong it should be pump->cpu->radiator
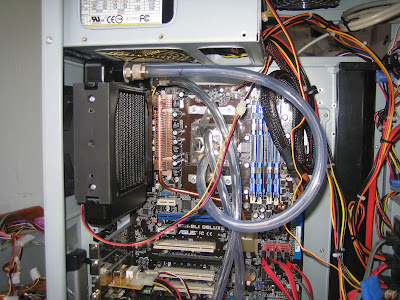
2. the fan blows warmth through the radiator into the case
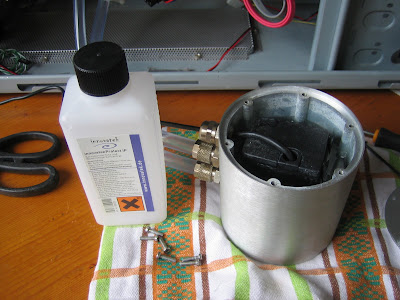
3. the proportion of coolant is too low

One can also wonder if the radiator shouldn't be outside of the case.

Another issue is the videocard. Currently I have installed an eVGA 8800GT and is getting really hot (about 75 degrees celsius). A videocard cooling block is nice to have, but not for the moment.

To summarize the current configuration:

AMD Athlon X2 5600+@2800MHz (stockspeed)
ASUS M2N-SLI Deluxe
4 x Kingston HyperX 512MB 4-4-4-12 (800 MHz)
eVGA 8800GT Superclocked (cpu/mem 650MHz/1900MHz)
3 x SATA HDD
Cooler Master STC-01 Stacker
Cooler Master STF-B01-E1 Cross Flow Fan

With 3DMark2006 op 1280x1024 default this setup runs at 10300 3Dmarks.

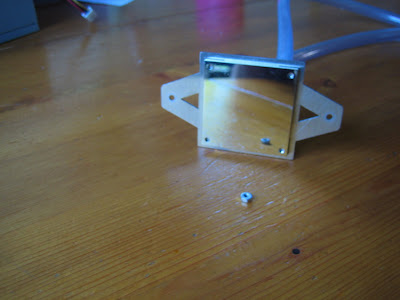
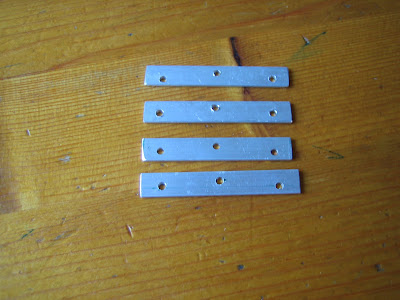
Next step is point 2. I have to come up with an alternative mounting solution. The rest is for tomorrow.

Building in watercooling III

I decided to move on and start filling the system with coolant (see below).


As coolant I use demi-water with cooling liquid and a sqeezed blue markerpen. To start the pump I use an extra powersupply which is jumpstarted with a paperclip on two pins.


In no-time the air is gone from the tubes and water is circulating through the tubes. The blue colour gives a nice effect.


Now it is time to close the case. And than it looks like this for an end-result. The question is if it cools?

Building in watercooling II

The cpu-waterblock is now attached on the motherboard. Seen from a side angle below.


The motherboard is built into the computercase. Next is hanging up the radiator. When you use aircooling on a cpu, it is customary to blow the air over the cpu. With a radiator it is customary to suck the air through the radiator. At the back of the case will the fan and the radiator be hung.

Due to the dimensions of the radiator it cannot be attached to the case directly, and a second problem is that the screw of the fan do not fit so that it can blow the air out of the case. So I have to improvise for the time being. Meaning I will hang up the radiator turned around so it will blow fresh air into the case through the radiator (for now (I know its not wise ;)).


At the bottom of the case the pump/reservoir is placed using velcro (klittenband). This is a picture of the pump/reservoir.


The next step involves attaching the tubes. Normally the sequence is pump->cpu->radiator. However I attached it wrong as well: pump->radiator->cpu. To be continued.

Building in watercooling I

In principle I have all the components to build in watercooling. First I will start with the cpu-waterblock.

The cpu-waterblock has a completely different holder (namely for amd64-socket). The dimensions for the brackets of an am2-socket are 95 mm x 48 mm for the mountingholes.


With two double strips of aluminium it's a precise fit for the am2-socket. Below are the strips.


I took the motherboard from the PC and had to puzzle a little with nuts and bolts. At the corners are m3 bolts with a 20 mm length. The motherboard (asus m2n-sli deluxe) has a metal backplate with four holes. The holes in the backplate however are 3,5 mm and the bolts don't fit (the holes are too big) . So the m3 bolts stick through and are fixated with metal and plastic bolts.

Now all is assembled, it is time to put coolingpasta on the cpu and attach the coolerblock. The whole is now attached firmly (not too firmly) as can be seen below.


The tube on the left will be for the intake of water and the tube on the right will be for the outtake. Air goes up, so that should be the proper way of attaching the tubes.

Tuesday, September 9, 2008

A little explanation to begin with

For years I have been a computer enthusiast. So I like to experiment with hardware and software with limited resources in the area of PC's.

My current setup consists of a Stacker STC-01 computercase. That one contains enough space for building a watercoolingset into. I'm very curious if watercooling makes a lot of difference opposed to aircooling. The current operating temperature (idle) inside the case is about 30 degrees celcius.

The watercoolingset I'm going to use comes from Germany, and is a Preytek Nemesis 120. The producer/supplier is Kailon.de. The set consists of a reservoir with an integrated waterpump, a cpu-waterblock and a radiator with one 120 mm fan.

I tested everything once (before building it into the system) and is works awesome. The next step is to prepare the PC and assemble the watercoolingset. During the preparation I found out that the cpu-waterblock doesn't fit onto the cpu socket of my system. It doesn't fit on an am2-socket.

Therefore I have ordered a fitting cpu-waterblock holder for an am2-socket. But since I haven't been receiving anything for the last two weeks, I have decided to come up with a custom solution.

To customize the cpu-waterblockholder, I fitted two double strips of aluminium onto the am2-socket/bracket. The next step is to build it into the system, which I intend to start doing tomorrow.

Monday, September 8, 2008

Start today

Today I started this blog. I'm going to try it out and fill the blog whenever I have something to add.